

 Posts
Posts


Showing posts with label Entertaining the kids. Show all posts
Showing posts with label Entertaining the kids. Show all posts
Monday, 17 November 2014
SIO Tips no. 70 - Christmas with Kids


Tuesday, 21 October 2014
Halloween Fizz Punch
Halloween is nearly here again folks - here are a few fab recipes for your punch bowl:
Fizz Punch - The possibilities are broad with this little recipe. Simply use half the amount of Sherbert to Soda of your choice to create a bubbling fizzing punch that looks like a science experiment. It's nice to use a hollowed out pumpkin as a punch bowl to make it feel more spooky! We like Lime Sherbert with Lemon and Lime soda to make a fab green punch.
Raspberry Ghoul - Place 2 cherries and 2 blueberries in each tall glass. Add 1 tablespoon of raspberry syrup into each. Gently pour 1 cup of lemonade over the fruit and top each glass with a scoop of ice cream.
Hot Apple - In a pot combine 1litre apple juice and 3 cinnamon sticks. Wrap 1/2 tsp allspice and 1/2 tsp cloves in a small piece of cheesecloth, and add to pot. Stir in 3 Tablespoons Brown Sugar. Bring to a boil over high heat. Reduce heat, and keep warm ready to serve on cold spooky nights! You can make this with Cider for the Grown-ups.
Have a spooky Halloween folks!

Fizz Punch - The possibilities are broad with this little recipe. Simply use half the amount of Sherbert to Soda of your choice to create a bubbling fizzing punch that looks like a science experiment. It's nice to use a hollowed out pumpkin as a punch bowl to make it feel more spooky! We like Lime Sherbert with Lemon and Lime soda to make a fab green punch.
Raspberry Ghoul - Place 2 cherries and 2 blueberries in each tall glass. Add 1 tablespoon of raspberry syrup into each. Gently pour 1 cup of lemonade over the fruit and top each glass with a scoop of ice cream.
Hot Apple - In a pot combine 1litre apple juice and 3 cinnamon sticks. Wrap 1/2 tsp allspice and 1/2 tsp cloves in a small piece of cheesecloth, and add to pot. Stir in 3 Tablespoons Brown Sugar. Bring to a boil over high heat. Reduce heat, and keep warm ready to serve on cold spooky nights! You can make this with Cider for the Grown-ups.
Have a spooky Halloween folks!
Thursday, 12 June 2014
Fathers Day Fun
I think Fathers Day should be as important and memorable as Mothers Day.
 In our house there was never such a fuss made, perhaps because we didn't really know what little things Dad would appreciate. Mum was always touched by bunches of hand picked wild flowers clutched in clumsy fingers; she would even forgive the hole left in her flower beds. Growing up we would spoil her with little things to make her day more special; the usual breakfast in bed, a hand-made card that got stuck to the fridge and stayed there until next year when it was finally filed away with other treasures.
 Fathers Day was different though, a card yes, Mum probably even bought his favourite treats for us to hand out too but we didn't do anything much together apart from the usual Sunday Dinner. All week long my Dad would work outside. I come from a farming family so sun up to sun set Dad was trudging around with no time for fun. Sundays didn't mean a day off, even on Fathers Day, so perhaps having a sleep in the easy chair after dinner was the best present he could have had!
I hope that one day, when I have kids of my own, we will focus a bit more on Daddy and make time to spend the day together, not just on Fathers Day.
 So, if you have kids and also feel that Daddy deserves more than a card this Fathers Day take a look on Pinterest for some great crafting ideas to get the whole family involved this weekend. Not only will it make your man feel appreciated but it will give the kids precious childhood memories and maybe start a lifelong tradition of making time for loved ones in our hectic lives a bit more.
Some of my favourite ideas:
In our house there was never such a fuss made, perhaps because we didn't really know what little things Dad would appreciate. Mum was always touched by bunches of hand picked wild flowers clutched in clumsy fingers; she would even forgive the hole left in her flower beds. Growing up we would spoil her with little things to make her day more special; the usual breakfast in bed, a hand-made card that got stuck to the fridge and stayed there until next year when it was finally filed away with other treasures.Fathers Day was different though, a card yes, Mum probably even bought his favourite treats for us to hand out too but we didn't do anything much together apart from the usual Sunday Dinner. All week long my Dad would work outside. I come from a farming family so sun up to sun set Dad was trudging around with no time for fun. Sundays didn't mean a day off, even on Fathers Day, so perhaps having a sleep in the easy chair after dinner was the best present he could have had!I hope that one day, when I have kids of my own, we will focus a bit more on Daddy and make time to spend the day together, not just on Fathers Day.
So, if you have kids and also feel that Daddy deserves more than a card this Fathers Day take a look on Pinterest for some great crafting ideas to get the whole family involved this weekend. Not only will it make your man feel appreciated but it will give the kids precious childhood memories and maybe start a lifelong tradition of making time for loved ones in our hectic lives a bit more.Some of my favourite ideas:
- Make tents out of blankets and have a picnic inside or even better, if you can, have a BBQ and make sure you remember the marshmallows for toasting!
- Collect smooth pebbles or rocks and paint them in fun patterns, use aboriginal art for inspiration. This can keep older children busy and inspired for ages and makes great paperweights for Dad's paperwork!
- Dig out the board games and have an afternoon of fun playing Cluedo, Pictionary or Go Fish...
- Use soda bottles filled with water as ten pin bowling pins. Daddy can show off his bowling skills and bond with the kids.
- Have a paper aeroplane making competition. Whoever has the best plane that flies farthest is the winner. You could also have prizes for the most funky design.
Thursday, 6 March 2014
Make your own bubble fun
Affordable and easy bubbles keep kids entertained; make up your own bubble solution and watch them have an absolute ball!
You will need:

1 1/2 tablespoons dish soap
1 1/2 teaspoons glycerin
Mix and leave overnight before using. Leaving over night is important to make a stronger solution so the bubbles don't burst so easily.

Remember this can be a bit of a messy fun-time so use a room that's easy to wipe down or better still get them outside in the fresh air.
Tuesday, 12 February 2013
Easy peasy, with lemon squeezy!
 |
| Easter is just around the corner... |
We forget to make them the rest of the year even though they are one of the easiest treats to whip up; with ingredients you usually have in your store cupboard and fridge. So there's nothing extra on the shopping list unless you want to get creative with your toppings!
Ingredients:
225g Plain flour
Pinch salt
2 large, fresh eggs
600ml Milk (I like to use 100ml Buttermilk and 500ml Milk for a nice texture)
2 tsp melted butter
Plus melted butter for cooking
Make:

Sieve the flour into a large bowl, add the salt. Make a well in the center of the flour, add the eggs and beat with a whisk. Once the flour has combined nicely with the egg start adding the milk (and buttermilk if using) until all the flour is mixed in. Then add the 2 tsp of melted butter and beat in.
Be careful not to over whisk the mixture because this can make the dough rubbery.
 Leave the batter to rest for at least 15 minutes or, if you can, prepare it in advance - just keep it in the fridge, covered, until you're ready to use it.

Lightly grease a hot frying pan with a little melted butter, veg oil or low fat spray oil if you prefer; add a ladle of batter to evenly and thinly coat the base of the pan. Cook until set and lightly golden. Flip over when you see that the batter is set on the top and cook for another 30 seconds on the uncooked side.

Remove the pancake from the pan, place on a sheet of kitchen paper and keep warm. Continue as above until all the batter is used up.

Serve:
Pancakes are usually served rolled up with brown sugar and lemon juice but you really can add anything to yours to make a unique treat for you. Pancakes are even great with savoury toppings, try them with bacon and maple syrup or melted cheese and ham.Here are a few other favourites from my family for you to try at home this pancake day:
Banana and Choc spread
Golden Syrup and Pecan nuts
Brown sugar mixed with Cinnamon powder
or if you really want to impress - Poached egg with Creamed Spinach
Enjoy your Pancake Day; whatever topping you think to try!
Thursday, 20 December 2012
Salt Dough Decorations
Following on from my recent blog for home-made play dough I decided to find my Mums' Salt Dough recipe and make some decorations for the Christmas tree. They make simple, effective baubles that you can keep year on year; just make sure you paint them well and store them in a dry place. This is a great activity to get the kids involved in and one they will remember for the rest of their lives.
You'll need a few simple things:

1 Cup Flour
1/2 Cup Salt
1/2 Cup Water
Acrylic Paints
Glitter
Ribbon/Wire
Mixing Bowl
Cookie cutters
Baking tray
Knitting needle or skewer
 Salt dough really couldn't be easier, you simply put the salt and flour in a mixing bowl and gradually add the water while mixing with your hand.
 When all the water is added you knead the dough for 10 minutes to mix it well and to make the dough more elastic.
 Once this is done you can set up your work station to roll out the dough and cut out shapes using the cookie cutters. If you're making these with kids try putting their dough on a tray and sit them at the kitchen table where they will be able to sit comfortably; your kitchen counters may be a little too high for them to work from.
 You may need a palette knife or fish slice to lift the delicate shapes.
Don't forget to use a knitting needle to poke a hole to hang the decorations by before they get too dry.
 Once you've cut your decorations out, lay them on a baking tray to dry. You can either leave them in a warm dry place to dry hard which will take a couple of days or you can put them in the oven at a very low temperature for a few hours. If you notice they are going a little brown you should cover them with tin foil until they are dried thoroughly.
 Now they are ready to decorate in any way you can think of! So get creative with paints, glitter, sequins or anything else you can stick onto your shapes. Don't forget to lay down newspaper first, especially if the kiddies are helping and be sure that you're around to supervise them.
Once they are dry you can thread your ribbon or wire through the hole and have fun finding places to hang them.
Have a very happy Christmas everyone!
Ruthie
You'll need a few simple things:

1 Cup Flour
1/2 Cup Salt
1/2 Cup Water
Acrylic Paints
Glitter
Ribbon/Wire
Mixing Bowl
Cookie cutters
Baking tray
Knitting needle or skewer
 Salt dough really couldn't be easier, you simply put the salt and flour in a mixing bowl and gradually add the water while mixing with your hand.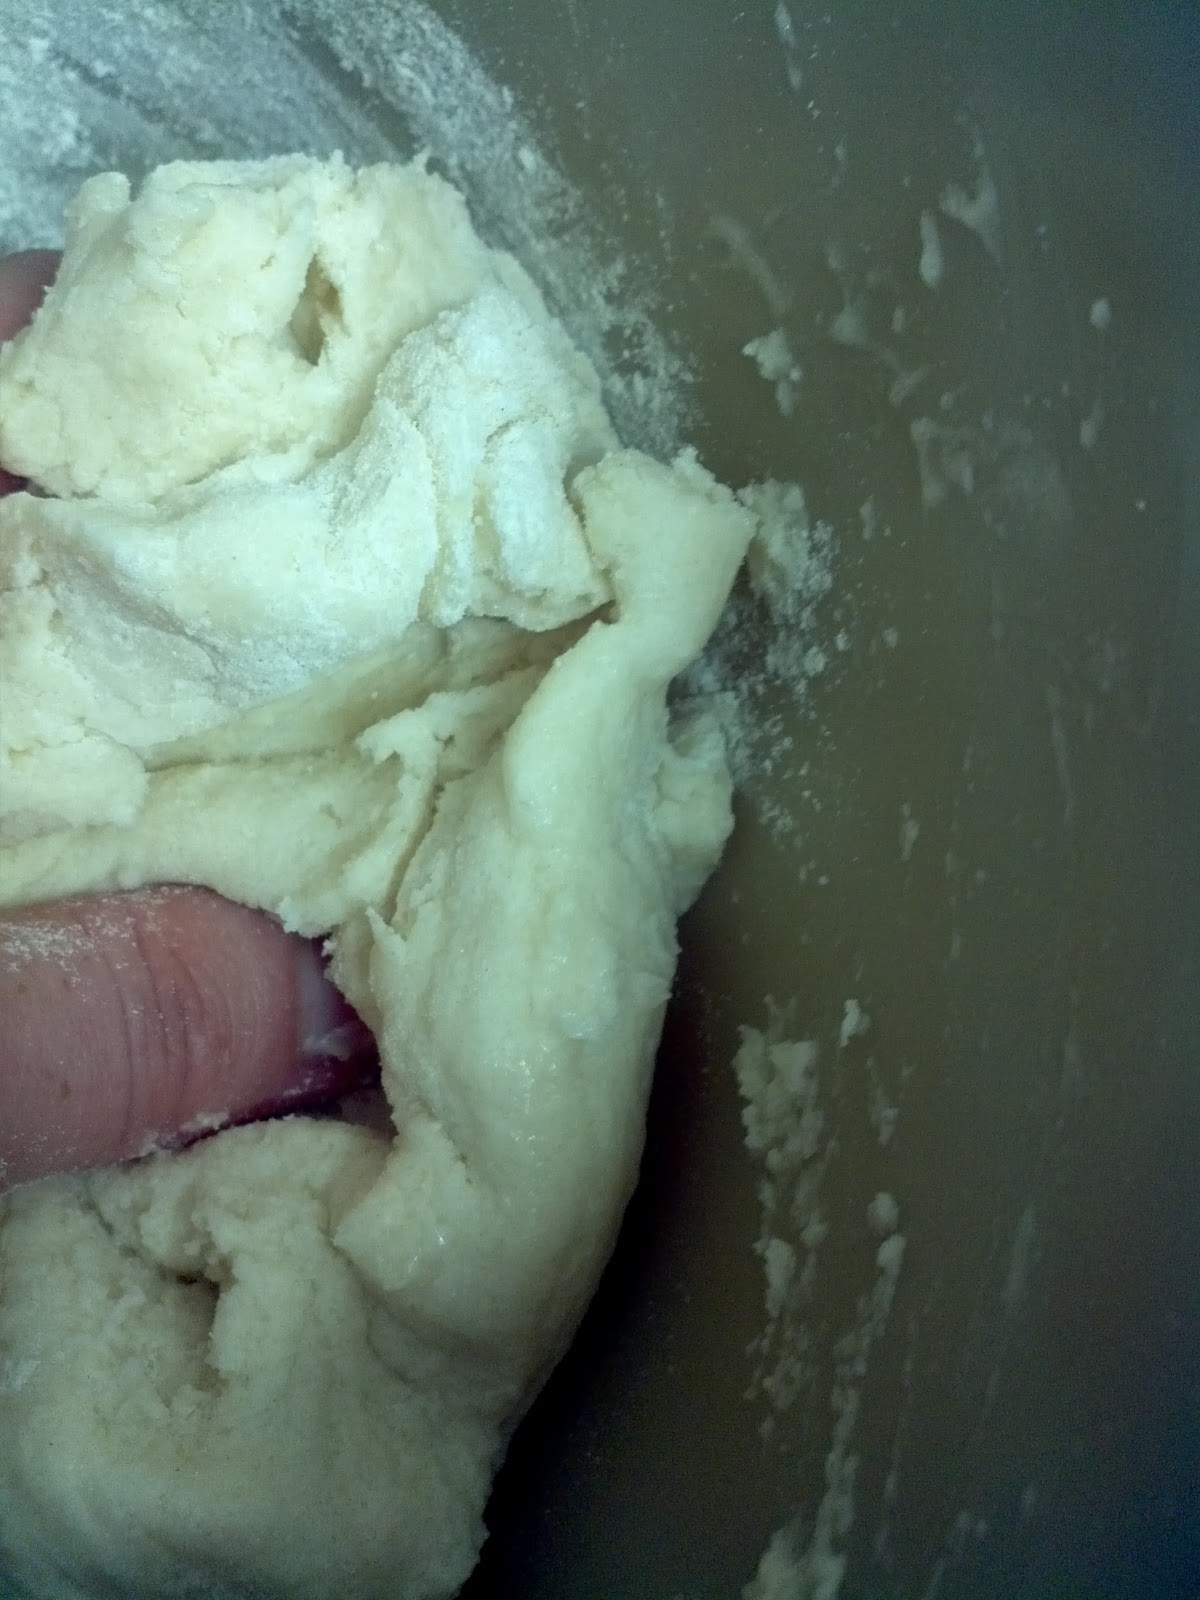


Don't forget to use a knitting needle to poke a hole to hang the decorations by before they get too dry.


Once they are dry you can thread your ribbon or wire through the hole and have fun finding places to hang them.
Have a very happy Christmas everyone!
Ruthie
Tuesday, 18 December 2012
Emergency Play-Dough for visiting kids
I don't have children of my own so am fairly unprepared for entertaining the kids of visiting friends. One such visit proved that necessity is indeed the mother of invention or rather creation in my case. I remembered my own Mum making us salt dough to play with. We would then bake the dough shapes we'd made and paint or varnish them but I wanted something brighter and more immediate - so I looked for a Play-dough recipe. Here's what I made...
What you'll need:
 1 Cup flour (I used plain)
1/2 Cup Table Salt
1 Cup Water (I used warm to speed things up)
1 Tablespoon Veg or Sunflower Oil
2 teaspoons Cream of Tartar
Food colouring, drop by drop
Plus a large non-stick pan
Measuring cups
Wooden Spoon
Plastic tray or wipeable surface to mix colouring
Empty plastic jars
Apron
Add all ingredients apart from the food colouring to the non-stick pan and turn on the heat to a medium temp.
The mix will look lumpy and goopy at first but it quickly comes together and the lumps get knocked out as you mix.
You'll know it's ready when the dough forms a ball and becomes impossible to mix any more.
Now you can divide it into however many colours you want to make.
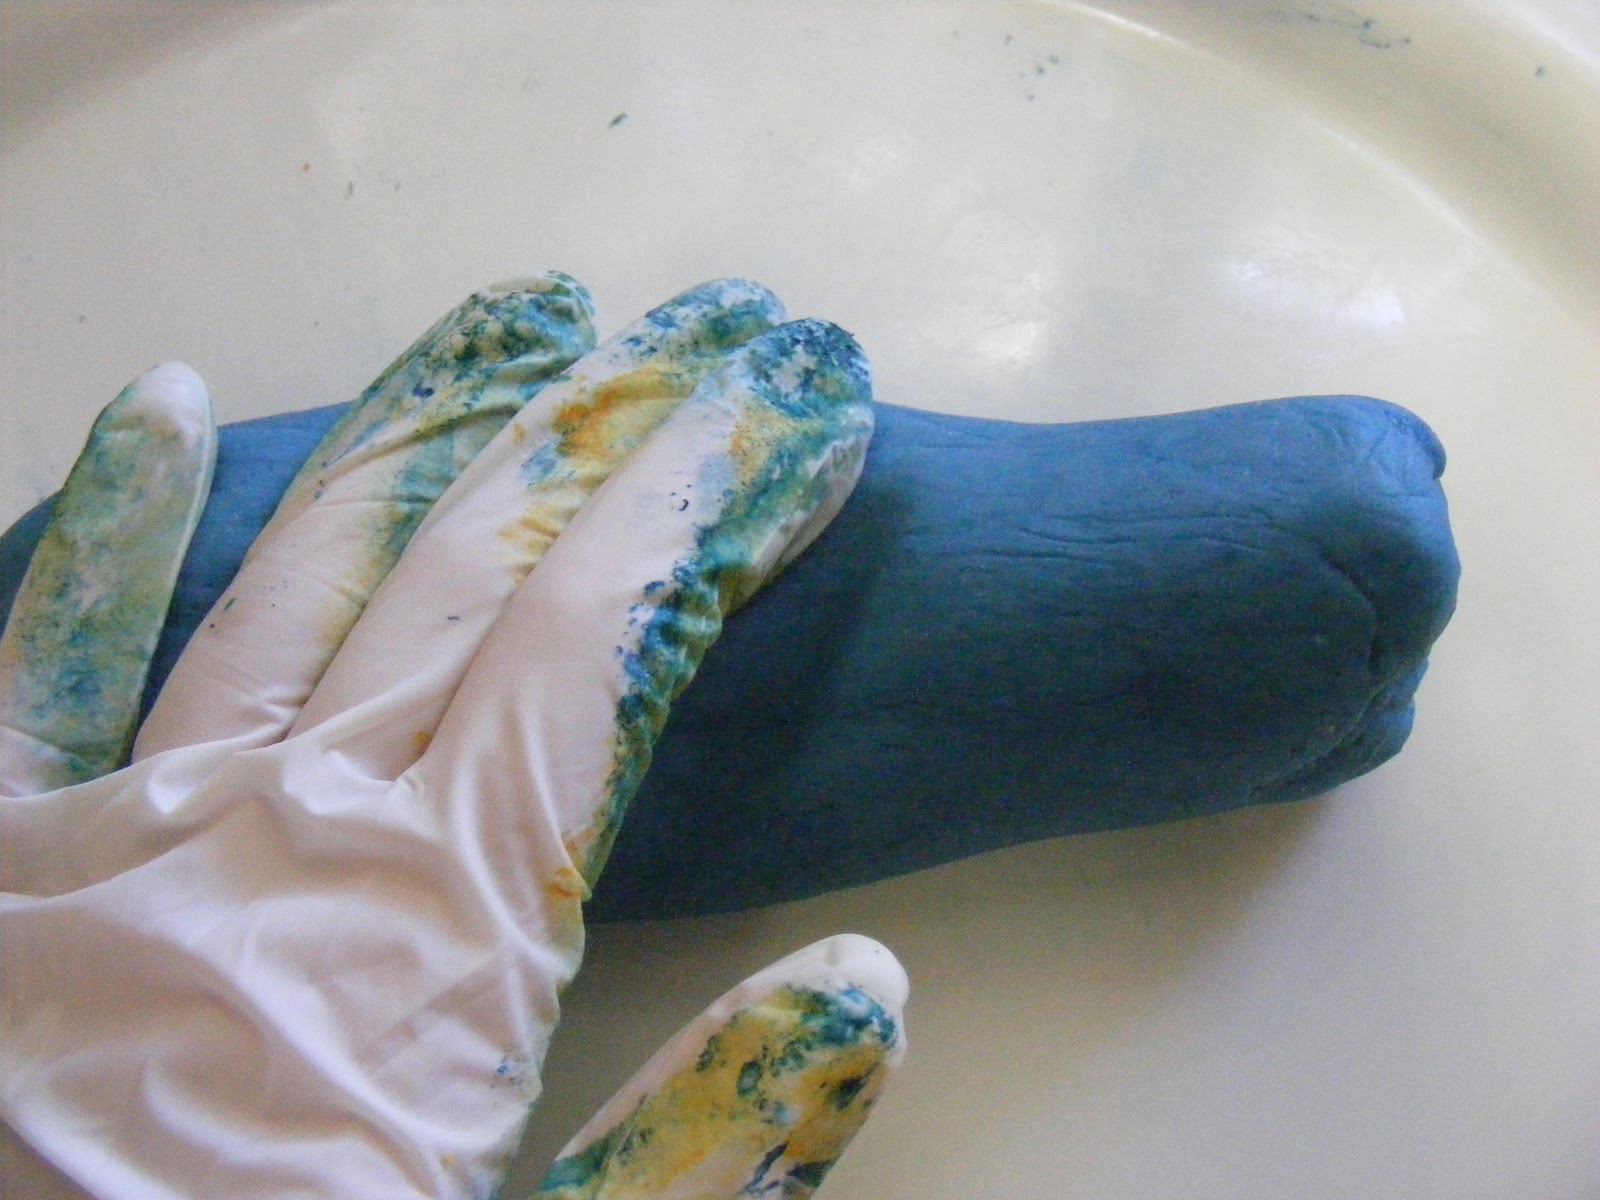
Make a dimple in the dough and add drops of food colouring and knead in until you have the colour you'd like.
I like to use rubber gloves for this part because the food colouring can get under your nails. It doesn't stain hands once it's mixed in properly so it's safe to let your child loose with.
You'll eventually have a lovely soft ball of dough. Ready to be played with by little ones or big kids alike.
Just make sure they play on a table or tray because play-dough isn't great for carpets!
Home made play-dough really is so much nicer than the shop bought stuff. It's totally edible so safe to leave small children to play with, though I can guarantee they won't want to eat much because of the high salt content. You could add some essential oil if you want to make it smell nice too.
Remember to supply cookie cutters and a rolling pin and go have some fun!
It's also great for stress relief, so you'll find everyone reaching for the pot to have a go after a long day. Get the whole family involved and try making up games to play like 3D Pictionary - Fun to play when the grown ups get together for Mulled Wine and Mince pies.
Have a fun-tastic festive season!
Ruthie
What you'll need:

1/2 Cup Table Salt
1 Cup Water (I used warm to speed things up)
1 Tablespoon Veg or Sunflower Oil
2 teaspoons Cream of Tartar
Food colouring, drop by drop
Plus a large non-stick pan
Measuring cups
Wooden Spoon
Plastic tray or wipeable surface to mix colouring
Empty plastic jars
Apron
Add all ingredients apart from the food colouring to the non-stick pan and turn on the heat to a medium temp.
 |
| Lumpy now but keep stirring... |
 |
| Now it's ready to add the colour |
 |
| Remember to use a tray |
 |
| Make a well before adding colour |
 |
| Knead the colour in well |
I like to use rubber gloves for this part because the food colouring can get under your nails. It doesn't stain hands once it's mixed in properly so it's safe to let your child loose with.
 |
| Ready to be played with |
Just make sure they play on a table or tray because play-dough isn't great for carpets!
 |
| Keeps fresh for ages if kept sealed |
Remember to supply cookie cutters and a rolling pin and go have some fun!
It's also great for stress relief, so you'll find everyone reaching for the pot to have a go after a long day. Get the whole family involved and try making up games to play like 3D Pictionary - Fun to play when the grown ups get together for Mulled Wine and Mince pies.
Have a fun-tastic festive season!
Ruthie
Wednesday, 5 December 2012
Surprise Baubles for this Christmas
Christmas eve is going to be extra busy this year with all the nephews and nieces coming for dinner. Excitement levels will be sky high so I decided to arrange a little pre-emptive entertainment.
Pinatas are everywhere at the moment - for children's parties, Hallowe'en and festivals. So why shouldn't Christmas get the mexican treatment too?
You will need:
Pack of small balloons
Scissors
Ribbon to hang
Shredded Newspaper/Brown Paper/Tissue Paper
Paste (1Cup flour to 2 Cups Water and pinch salt)
1" paint brush
2 Lengths of cardboard
Treats to fill the finished baubles
Embellishments to decorate
Firstly make up your paste: It's really very simple, boil together 1 Cup plain flour with 2 cups water - keep stirring until it starts to thicken then add a pinch of salt and take off the heat. I store mine in a used yoghurt pot with a sealable lid (keep in a cool place). Once this is made you're ready to set up a work space, be sure to lay down newspaper or a plastic sheet on your table and an apron to protect your clothes. Get comfy with a nice pot of tea or a glass of wine before you start.
I made a simple stand to hold the balloons as they dried by cutting two lengths of card (kindly decorated by my 2 year old nephew) I cut a slit down the middle of each piece and slotted them together to make a X shape. Along each side I cut two more shallow slits to hold the knots of the balloons as they were drying.
Now you can shred your paper and blow up the balloons to the size you prefer (I decided on keeping them fairly small and liked the varied shapes not being properly round)
I found that the cut paper wasn't so easy to stick and blend in as ripped paper so forget precision and get stuck in - great for stress relief but noisy so not great if your family is trying to watch their favourite program in the same room but is fun if you have a little helper.
I brushed a layer of the paste onto the balloon as well as onto the paper itself. You'll find that the paste soaks through the paper this will give it strength when its dry. I left mine overnight to dry and did another layer the following afternoon.
These take a little while to make because each layer needs to dry before adding the next. You can speed up the drying time by choosing a warm place to leave them to dry or perhaps a hairdryer?
After the second layer is dry you need to add your ribbon. I taped it to the bottom and all the way around before adding another layer of paper. This way the hanging loop is firmly attached ready for the kids to bash them on Christmas eve.
Be sure to leave a gap either side of the ribbon ready for you to make the opening to fill the baubles when this layer is dried.
Another layer goes on top I finished some with Brown Paper ready to be embellished with sparkles, buttons, ribbons or metallic pen, some had a layer of white tissue to help masque the newsprint before painting and the others will have one more layer using christmassy gift wrap to make an easy decorative finish. When this layer is dry you will see the pinatas are now quite tough and ready to be filled. Take your scissors and cut a hole big enough to fit your treats through in the top, cutting the knot off the balloon and you can carefully pull the rubbery layer out.
Now to fill with sweets and tissue paper pieces (only if you don't mind cleaning the confetti up) and seal the top to match the last layer before decorating.
Now really is the fun part - you can decorate these baubles however you like...so let your imagination run and get the kids involved too, they'll love decorating their own, though they may not want to bash them open on the night - they can always get to the goodies inside by poking through the thinner layer covering the hole.
Have fun being creative this Holiday season...
Ruthie
in South Africa
Pinatas are everywhere at the moment - for children's parties, Hallowe'en and festivals. So why shouldn't Christmas get the mexican treatment too?
 |
| Getting prepared |
Pack of small balloons
Scissors
Ribbon to hang
Shredded Newspaper/Brown Paper/Tissue Paper
Paste (1Cup flour to 2 Cups Water and pinch salt)
1" paint brush
2 Lengths of cardboard
Treats to fill the finished baubles
Embellishments to decorate
 |
| Mixing the paste |
 |
| Keeping things neat |
Now you can shred your paper and blow up the balloons to the size you prefer (I decided on keeping them fairly small and liked the varied shapes not being properly round)
 |
| Ripped paper is better |
 |
| First layer going on |
 |
| Left out to dry |
 |
| Securing the ribbon |
Be sure to leave a gap either side of the ribbon ready for you to make the opening to fill the baubles when this layer is dried.
 |
| Ready to be filled & decorated |
 |
| Sweet inside |
Now really is the fun part - you can decorate these baubles however you like...so let your imagination run and get the kids involved too, they'll love decorating their own, though they may not want to bash them open on the night - they can always get to the goodies inside by poking through the thinner layer covering the hole.
 |
| Ready for the tree |
Ruthie
in South Africa
Subscribe to:
Posts (Atom)
