Welcome to the Blog for www.seekitout.co.uk.

Seek It Out: taster crafting kits and stunning designer items for your home

Visit www.seekitout.co.uk TODAY!


Showing posts with label christmas parties. Show all posts

Wednesday, 18 December 2013

Wrap it up! - Creative Gift wrapping tips no. 4


There are lots of ways to make your pressies stand out from the crowd; Here is our latest fab idea to make your wrapping unique this year:

You can buy simple card boxes which you can paint, decoupage or cover with sparkling beads, not only does it hold the gift, it goes on to be a second bonus gift.

Luggage tables, lino cutouts and even key rings can make brilliant gift tags.The world is there for the taking, go on enjoy yourself.

SEEK IT OUT: Changing the world a stitch at a time.

Wednesday, 11 December 2013

Wrap it up! - Creative Gift wrapping tips no. 3


There are lots of ways to make your pressies stand out from the crowd; Here is our latest fab idea to make your wrapping unique this year:

Why not write a little poem to appear on your wrapping, personalise for each gift. Old photos also make great gift tags. Use tubes from kitchen roll, cover and pinch the ends to make great necklace gift boxes.

SEEK IT OUT: Changing the world a stitch at a time.

Wednesday, 4 December 2013

Wrap it up! - Creative Gift wrapping tips no. 2


There are lots of ways to make your pressies stand out from the crowd; Here is our latest fab idea to make your wrapping unique this year:

Brown paper, wall lining paper or even newsprint (go for the glossy not the daily, it rubs off) makes for unusual and fun wrappings.  There are lots of £1 shops on the high street and chains offering budget craft supplies.  Look out for sticker books, ink stamps, discount ribbons and coloured pens. Armed with this lot you can take simple brown paper and personalise it to make a present special, thoughtful and unique.

SEEK IT OUT: Changing the world a stitch at a time.

Wednesday, 27 November 2013

Wrap it up! - Creative Gift wrapping tips no. 1


There are lots of ways to make your pressies stand out from the crowd; over the coming weeks we'll give you a some fab ideas to make your wrapping unique this year: 

Inexpensive fabric remnants make for lovely wrappings. You can turn over and iron quick hems with wonderweb or stitch using zigzag or other pretty stitches in a contrasting colour. Glue a remnant of the fabric to card and cut out designer gift tags to complete the look. 

SEEK IT OUT: Changing the world a stitch at a time.

Tuesday, 12 November 2013

Baubles re-visited - Another look at last years decorations


Last year I wrote this blog about making mini Pinatas for the Christmas Tree. They were so popular with the kids and grown-ups alike I thought I would re-share this great way to make the festive season even more special!

Christmas eve is going to be extra busy this year with all the nephews and nieces coming for dinner. Excitement levels will be sky high so I decided to arrange a little pre-emptive entertainment.

Pinatas are everywhere at the moment - for children's parties, Hallowe'en and festivals. So why shouldn't Christmas get the mexican treatment too?

Getting prepared
You will need:

Pack of small balloons
Scissors
Ribbon to hang
Shredded Newspaper/Brown Paper/Tissue Paper
Paste (1Cup flour to 2 Cups Water and pinch salt)
1" paint brush
2 Lengths of cardboard
Treats to fill the finished baubles
Embellishments to decorate


Mixing the paste
Firstly make up your paste: It's really very simple, boil together 1 Cup plain flour with 2 cups water - keep stirring until it starts to thicken then add a pinch of salt and take off the heat. I store mine in a used yoghurt pot with a sealable lid (keep in a cool place). Once this is made you're ready to set up a work space, be sure to lay down newspaper or a plastic sheet on your table and an apron to protect your clothes. Get comfy with a nice pot of tea or a glass of wine before you start.

Keeping things neat
I made a simple stand to hold the balloons as they dried by cutting two lengths of card (kindly decorated by my 2 year old nephew) I cut a slit down the middle of each piece and slotted them together to make a X shape. Along each side I cut two more shallow slits to hold the knots of the balloons as they were drying.

Now you can shred your paper and blow up the balloons to the size you prefer (I decided on keeping them fairly small and liked the varied shapes not being properly round)

Ripped paper is better
I found that the cut paper wasn't so easy to stick and blend in as ripped paper so forget precision and get stuck in - great for stress relief but noisy so not great if your family is trying to watch their favourite program in the same room but is fun if you have a little helper.

First layer going on
I brushed a layer of the paste onto the balloon as well as onto the paper itself. You'll find that the paste soaks through the paper this will give it strength when its dry. I left mine overnight to dry and did another layer the following afternoon.


Left out to dry
These take a little while to make because each layer needs to dry before adding the next. You can speed up the drying time by choosing a warm place to leave them to dry or perhaps a hairdryer?


Securing the ribbon
After the second layer is dry you need to add your ribbon. I taped it to the bottom and all the way around before adding another layer of paper. This way the hanging loop is firmly attached ready for the kids to bash them on Christmas eve.
Be sure to leave a gap either side of the ribbon ready for you to make the opening to fill the baubles when this layer is dried.


Ready to be filled & decorated
Another layer goes on top I finished some with Brown Paper ready to be embellished with sparkles, buttons, ribbons or metallic pen, some had a layer of white tissue to help masque the newsprint before painting and the others will have one more layer using christmassy gift wrap to make an easy decorative finish. When this layer is dry you will see the pinatas are now quite tough and ready to be filled. Take your scissors and cut a hole big enough to fit your treats through in the top, cutting the knot off the balloon and you can carefully pull the rubbery layer out.


Sweet inside
Now to fill with sweets and tissue paper pieces (only if you don't mind cleaning the confetti up) and seal the top to match the last layer before decorating.

Now really is the fun part - you can decorate these baubles however you like...so let your imagination run and get the kids involved too, they'll love decorating their own, though they may not want to bash them open on the night - they can always get to the goodies inside by poking through the thinner layer covering the hole.


Ready for the tree
Have fun being creative this Holiday season...

Ruthie
in South Africa


Monday, 24 December 2012

Alcohol Free Winter Warmers No 3


Designated driver or simply want to give the grog a miss then we have some ideas for you.  Simple and easy to achieve and you do not have to produce gallons at once! Evening or morning, Christmas or not these drinks are lovely.

Apple Hooch - alcohol free apple punch
Serves 6-8

Sturdy pan

Two cartons of pure apple juice

One carton of quality pineapple juice

Zest of one orange

Slice the orange into 12 half slices after zesting

Push a clove into each orange piece

4 cinnamon sticks cut each in half to create 8 small sticks

Sweetening - if needed (pineapple is very sweet) use honey or sugar.


Add all ingredients excluding the sweetener of your choice, warm through but do not boil, add slowly your sweetener a little at a time till you are happy if required.  Simmer never boil and serve ensuring each cup gets a slice of orange or a cinnamon stick


Want to add alcohol to some of your mixture, separate off the quantity you want to add to and pour in rum to suit, never boil as this kills the alcohol as it will start to evaporate.

Again as with other recipes can be prepared in advance and heated as needed.  Kept warm in a flask or slow cooker.

You could decorate your heat proof glasses or mugs with apple slices, remember you will need to dip in lemon juice or they will go brown.

ENJOY

Tuesday, 18 December 2012

Emergency Play-Dough for visiting kids

I don't have children of my own so am fairly unprepared for entertaining the kids of visiting friends. One such visit proved that necessity is indeed the mother of invention or rather creation in my case. I remembered my own Mum making us salt dough to play with. We would then bake the dough shapes we'd made and paint or varnish them but I wanted something brighter and more immediate - so I looked for a Play-dough recipe. Here's what I made...

What you'll need:

1 Cup flour (I used plain)
1/2 Cup Table Salt
1 Cup Water (I used warm to speed things up)
1 Tablespoon Veg or Sunflower Oil
2 teaspoons Cream of Tartar
Food colouring, drop by drop

Plus a large non-stick pan
Measuring cups
Wooden Spoon
Plastic tray or wipeable surface to mix colouring
Empty plastic jars
Apron

Add all ingredients apart from the food colouring to the  non-stick pan and turn on the heat to a medium  temp.

Lumpy now but keep stirring...
The mix will look lumpy and goopy at first but it quickly comes together and the lumps get knocked out as you mix.


Now it's ready to add the colour
You'll know it's ready when the dough forms a ball and becomes impossible to mix any more.


Remember to use a tray
Now you can divide it into however many colours you want to make.


Make a well before adding colour
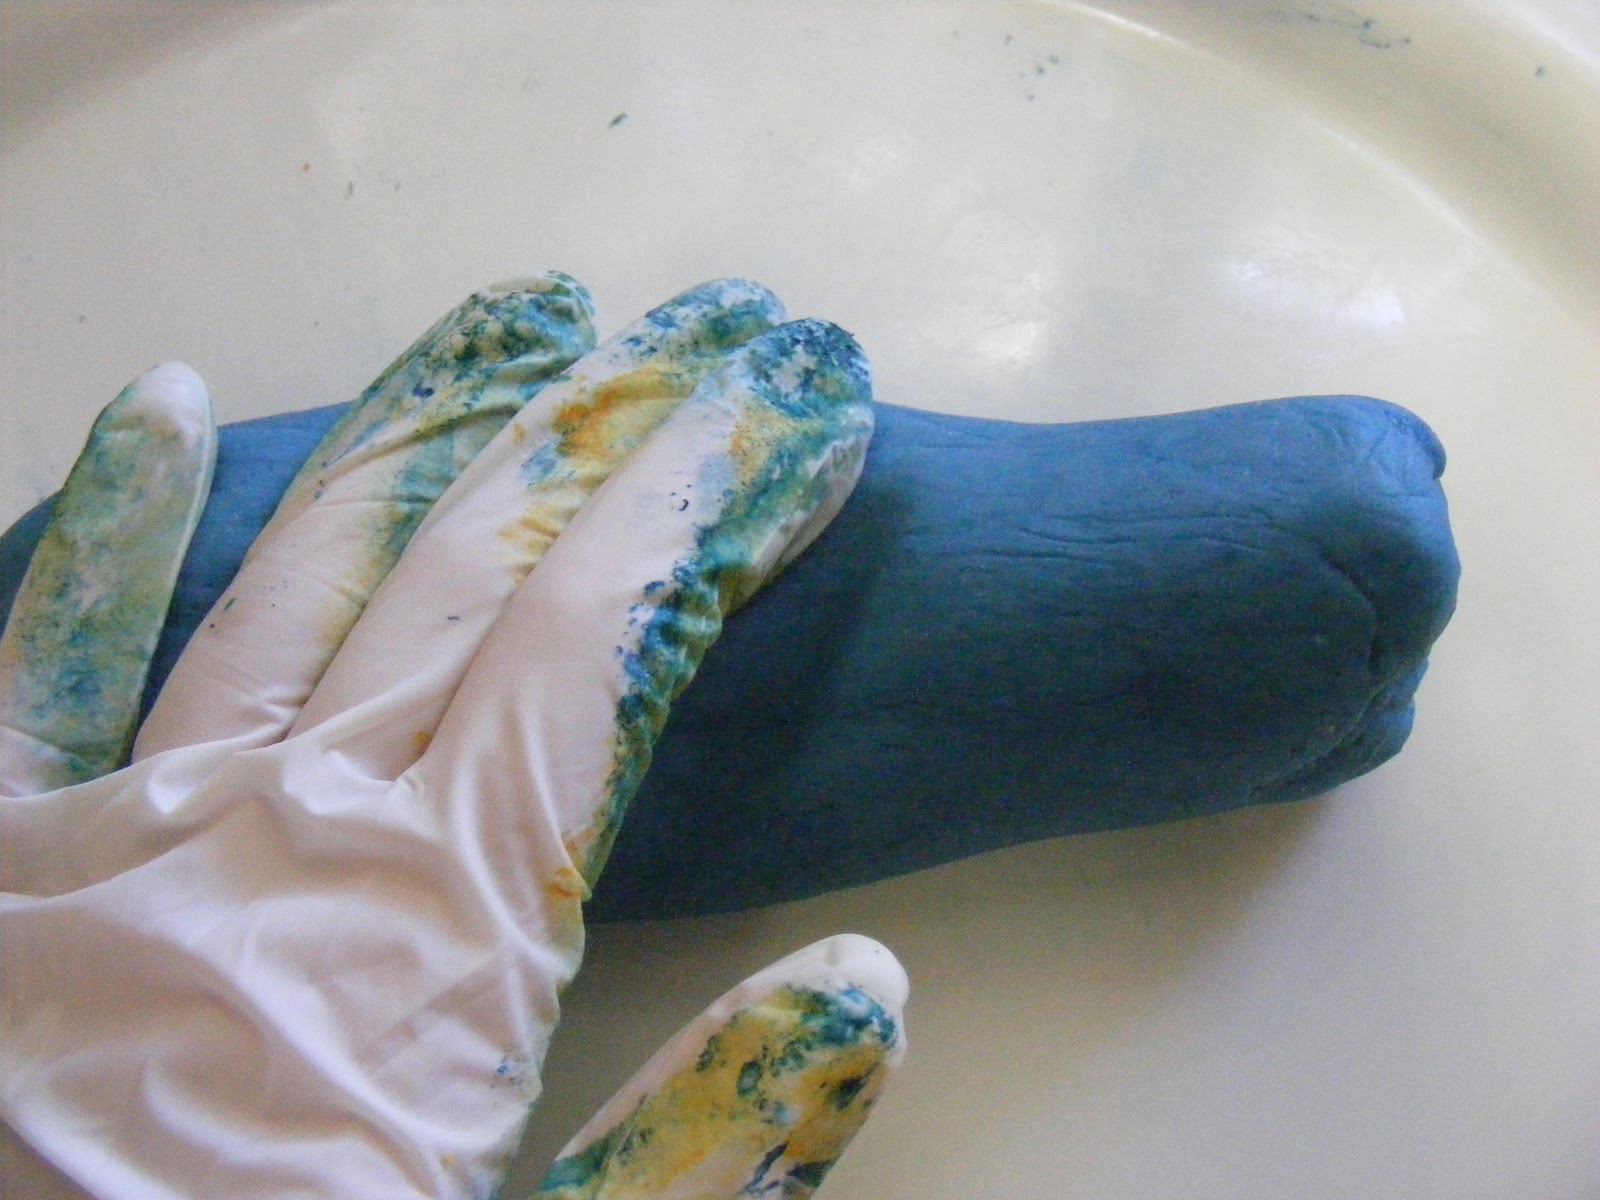
Make a dimple in the dough and add drops of food colouring and knead in until you have the colour you'd like.


Knead the colour in well

I like to use rubber gloves for this part because the food colouring can get under your nails. It doesn't stain hands once it's mixed in properly so it's safe to let your child loose with.


Ready to be played with
You'll eventually have a lovely soft ball of dough. Ready to be played with by little ones or big kids alike.
Just make sure they play on a table or tray because play-dough isn't great for carpets!


Keeps fresh for ages if kept sealed
Home made play-dough really is so much nicer than the  shop bought stuff. It's totally edible so safe to leave small children to play with, though I can guarantee they won't want to eat much because of the high salt content. You could add some essential oil if you want to make it smell nice too.
Remember to supply cookie cutters and a rolling pin and go have some fun!

It's also great for stress relief, so you'll find everyone reaching for the pot to have a go after a long day. Get the whole family involved and try making up games to play like 3D Pictionary - Fun to play when the grown ups get together for Mulled Wine and Mince pies.

Have a fun-tastic festive season!

Ruthie

Friday, 7 December 2012

Alcohol Free Winter Warmers No 1

Designated driver or simply want to give the grog a miss then we have some ideas for you.  Simple and easy to achieve and you do not have to produce gallons at once! Evening or morning, Christmas or not these drinks are lovely.

Oxymel - dates back to antiquity but here is the 21st version!
Individual portion

Big mug
Two slices of fresh lemon
Two slices of fresh root ginger
Large glug of honey (amount to suit your sweetness preference)
Top up with boiling water, stir and leave to infuse, stir and drink when cooled a little. Leave all the ingredients in, as it will continue to infuse.

Reheats well - microwave or pan, leave all the ingredients in.
You can also add a sliver or two of lemon grass for an even more oriental taste.
Served infused and chilled on a hot summers day. 


ENJOY